Here is the long-awaited "surprise project" that I have been referring to for a couple of months! It is a Do-It-Yourself Puzzle Mat!
I got this puzzle for Christmas and have been wanting to put it together. Having a toddler in the house ensures that attempting it would be futile at best without some precautionary measures in place. I looked online to see how much buying a puzzle mat would cost, then had the idea to make one myself! The cost probably came out to be about the same as buying one of the more inexpensive ones, but it was more fun to make it myself.
Supplies I Used:
- mailing tube about 3" in diameter
- clear packing tape
- velcro strips
- colored duct tape
- felt
- double-fold bias tape about 1" in width
I put a lot of thought and a little bit of spontaneous "make-do" to constructing the puzzle mat. I thought about using a PVC pipe with endcaps, but found out that Home Depot will not cut them to size. I settled on using a mailing tube that I bought at Office Depot. I thought about painting the ends, but didn't want to go through that since cardboard can suck up paint and might not look nice. So, I had the idea to try duct tape which worked beautifully.
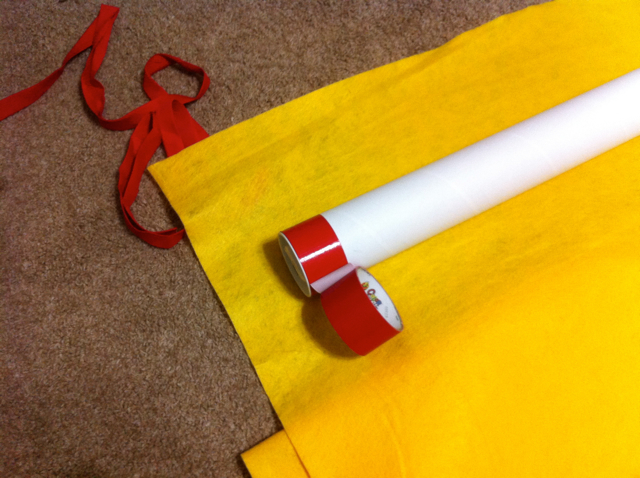
First, I rolled red duct tape (which I already had) around the ends of the mailing tube.
Then, I used clear packing tape to attach one end of the felt to the mailing tube. I had already cut felt to the size that I wanted it. Actually, I cut it before getting the mailing tube and found out that it was not wide enough which is why I put the duct tape on either end.
Then, I put peel-and-stick velcro onto the felt and rolled it up to make it stick so that the mailing tube was enclosed by the felt which was held together by the velcro.
I cut the double-fold bias tape to size to fit around the puzzle mat and put velcro on to secure. The strips come off; they are not attached to the felt. I will be sewing the velcro onto the strips as they want to come off.
Here it is, all rolled up!
Lastly, I cut another piece of the red double-fold bias tape and taped it to one of the endcaps.
I inserted the endcap and that made a loop to hang the puzzle mat when it is not in use.
Here is the puzzle mat being used for my puzzle. It works just fine. I like the bright yellow which is a great contrast without being too overbearing for the puzzle pieces. The only thing I do not like is that the puzzle pieces stick really well to the felt which makes it hard to move multiple pieces that are connected. I'm thinking about using wax paper or something under the pieces to allow them to slide around more easily. It rolls up just fine. I have not yet unrolled it to work on the puzzle some more, but I hope to do that sometime soon.


What a great idea, again! :) I've never worked "real" puzzles, I don't know why. I've always just done the small ones with the kids. I'm going to remember this if we ever start doing puzzles. Thanks for sharing!
ReplyDeleteWondering what else I could use instead of felt, because I don't have any and can't get to a store right now
ReplyDeleteYou may be able to use flannel.
DeleteWondering what else I could use instead of felt, because I don't have any and can't get to a store right now
ReplyDelete