Saturday, March 31, 2012

Blog Post Roundup 3/31/12

Here are some posts I thought y'all might be interested in.


How to Get Your Toddler to Eat Anything @ Five in Tow

Tea Time Discipleship @ The Better Mom

10 Ways to Renew Your Spirit @ Encouraging Words

Building a Legacy of Faithfulness @ Pastor Paul Chappell

My Reputation @ Learning God's Lessons (a new-to-me blog that is well worth following!)

I Can't Wait (Part 1)
I Can't Wait (Part 2) @ Learning God's Lessons
Pin It!

Thursday, March 29, 2012

How Many Stamps?

One thing that I consider to be somewhat of a time-waster is taking letters to the post office to see if they need more than one stamp, especially at my post office which is not very efficient.

It came to me one day that the perfect solution is to use my digital kitchen scale to weigh the letter!  Anything less than 1 ounce takes one first class/forever stamp.

Another tip I read somewhere is to keep the kitchen scale in a drawer.  When you need it, open the drawer and there it is, ready to use!  Before I'd been keeping it in an upper cabinet and taking it out as needed.  I don't have to move the scale at all.  I bought this scale at Target, I believe, and I really like it.  We've even used it for the Pine Derby Race at church.
Pin It!

Saturday, March 24, 2012

Thursday, March 22, 2012

Corndog Muffins

I've seen a couple of different pins on Pinterest for these Corndog Muffins.  I could only find one of them quickly when I was ready to make them, so I used the one that's shown at the bottom of this post.

Before cooking
Ingredients:
Jiffy cornbread mix (plus whatever it takes to make the batter)
hotdogs (Hebrew National is our favorite brand)
cheese
shortening to grease muffin tins
chili (optional but recommended)

Directions:
1.  Mix up the Jiffy cornbread batter.
2.  Cut up the hotdogs.  I cut them into "coins" rather than chunks for my daughter.
3.  Grease the muffin tins.
4.  Put about a spoonful or so of batter in the muffin wells.  Put in some hotdogs (I put 5 "coins."), add some cheese (I did not add enough), and top with more batter.
5.  Bake according to Jiffy directions.

I only had one box of Jiffy so I was only able to make 8 muffins.  We also had some hotdogs left over in the package.  I put them in a baking dish and baked them along with the muffins.  They came out perfectly cooked.

I wasn't sure if the cornbread muffins would be rather dry, so I heated up some Hormel chili with beans to eat on the muffins and/or hot dogs.  They definitely added to the meal.

Gracie ate one of the muffins at supper and enjoyed it.  When I gave her the two leftover muffins for lunch, she had her Grandma help her pick out the hotdogs and she ate those, leaving the cornbread.

Ready to eat!

This was an ok recipe.  I would not have wanted them plain, so I'm glad I added the chili.  I couldn't really detect the cheese, so I did not put enough.  Since Gracie picked out the hot dogs, I'm guessing she's not a big fan of the cornbread, either.  Maybe when she is older, she will like them better.  They would make a great make-a-bunch-ahead-and-freeze lunch for her.


Original Source:
Pin It!

Tuesday, March 20, 2012

Cooking Bacon in the Oven

I found this idea on Pinterest. I liked the idea of cooking so much bacon at once with less cleanup. I also thought it would be great to cook up a bunch of bacon at once in the evening to have ready for breakfast over the next few days.

I cooked up two baking sheets' worth of bacon (16 slices). The first batch I cooked for 20 minutes at 350. They didn't look done enough, so, for the second batch, I cooked them for 22 minutes at 350. I put them in a container and put them in the fridge.

Just about every day this week, I've microwaved the bacon for breakfast. I put two or three (usually three) slices inside a folded-up paper towel on a microwave plate and set the microwave for 1 minute. It comes out perfectly and is oh-so-good!


Original source:
Pin It!

Wednesday, March 14, 2012

Laura Ingalls Wilder Reading Challenge Review

I know I'm really late on posting about the Laura Ingalls Wilder Reading Challenge that I did last month.  The Challenge was hosted by Barbara at Stray Thoughts blog.

I did get to read two of Laura's books, Little House in the Big Woods and Little House on the Prairie.  I really enjoyed reading them.  These books are like "comfort food" to me.  They remind me of a very happy time in my childhood and make me think of the olden days like what my grandparents lived in.  My grandma had just gone to Heaven before I started reading and it was a good time to read these books.

Little House in the Big Woods takes place when Laura is four and five years old.  It covers one year from fall to fall.  In LHitBW, we learn about many things that the Ingalls have to do just to survive:  butchering, hunting, gardening, churning butter, smoking meat, and I'm sure there's more that I can't think of right now.  We also read about the fun things that Laura and her sister Mary do: play ball with the pig's bladder, play among the harvested vegetables in the attic, attend a dance at their Grandma's, play with cousins, make snow angels, eat snow ice cream, visit town for the first time in their lives, and play with their dolls.  We learn about Ma who is very industrious and quiet and Pa who is loud and playful.  We read wonderful stories told by Pa and if we listen hard enough, we can hear Pa's fiddle as he plays at bedtime.

Little House on the Prairie takes place the next year after LHitBW.  Pa has decided to move west to find a better place to live, one that has better hunting and room to breathe.  Ma probably didn't like the idea too much as she is always one for being near civilization, school, and church, but she supports her husband and is an excellent example of a helpmeet to him.  Laura thinks it's all one grand adventure.  You can really sense the excitement and wonder throughout the book.  I love how Laura describes how they made a home on the prairie.  They were such hard workers, thrifty and creative in making do.

As a mother, I really liked how both books stressed obedience.  I really can't wait to be able to read these with my daughter!

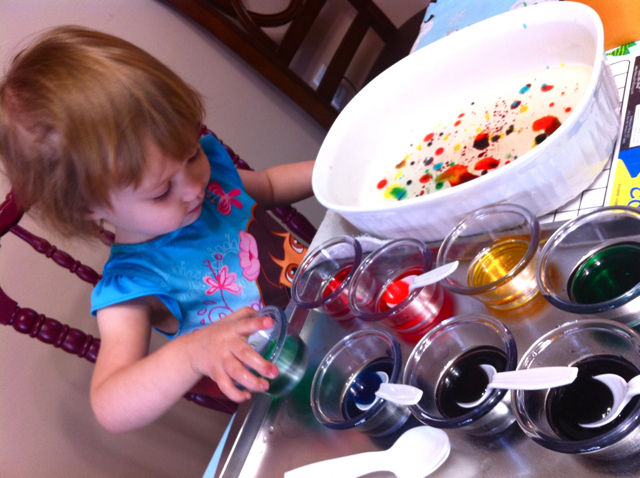
I forgot to mention that I did find a few of the picture books to read with Gracie.  I'm sorry to say that she wasn't very impressed.  When she gets older, I think she will like them, though.

I didn't get to try any recipes.  I really wanted to make the heart-shaped cakes, but I didn't get to.  Maybe next year!
Pin It!

Tuesday, March 13, 2012

Rainbow Drops

 Gracie, like me, takes a little while to wake up in the mornings.  Most of the time, after she wakes up and I get her out of bed, I take her into the living room and we'll sit on the couch and watch TV until she's wide awake and raring to go.  This morning, we watched the Sprout channel.  The hostess was doing a fun art activity with Chica where they were dropping colored water into a pan of colored water, making neat designs.  I asked Gracie if she wanted to do that and she said, somewhat hesitantly, "please."

I could tell that either the liquid in the baking dish they used or the colored water was oil-based since the two liquids were not really mixing all that much.  This is what we wound up doing:  I poured vegetable oil into the baking dish, just enough for a thin layer.  I then poured water into eight condiment cups (which I bought to use to feed Gracie baby food when she was very small) and dropped food coloring into each, roughly the colors of the rainbow.  I put the cups onto a tray along with some plastic spoons, mostly to make it easier to carry all of them to the table, but it also helped to give them a "home" so that Gracie wouldn't put them all over the place risking spills.

Gracie really enjoyed this activity!  I'm glad I took the time to be spontaneous and do an activity that was fun for both of us to do together!

Starting out, she's intrigued by the setup!

ROY G BIV

 
This is supposed to be a video.  Hope it shows up!

She was having fun!

So intent!

Busy at it!

After a while, the colors did run together.

It's fun to dump the whole thing in, too!
Pin It!

Monday, March 12, 2012

Firecracker Burgers

A friend of mine shared this recipe on Facebook, and I tried it out the very next day!  Unfortunately, I did not take any pictures.


Ingredients:
1 lb. hamburger meat
1/4 cup salsa (I used the nasty Great Value salsa that I bought to try, didn't like it, and told Robert he could have it.)
2 tsp Taco seasoning (I used 1 tablespoon of my homemade taco seasoning.)
2 tsp garlic salt (I used 1 tsp of garlic powder and 1/4 tsp of salt.)

Mix well and cook.  Be careful because the meat will turn dark on the inside before it is actually done.

Top with pepperjack cheese and guacomole (optional).

Robert and I both really liked these burgers!
Pin It!

Saturday, March 10, 2012

Blog Post Roundup 3/10/12

Here are some article I think are worth passing along.


The Simple Overlooking of a Daily Duty @ Like a Bubbling Brook

Waiting on God @ Keeper of the Home (Note: Bible verses used are not KJB)

4 Ways to Take the Drudgery out of Motherhood @ Keeper of the Home

The Rules @ Five in Tow


Counting the Hours @ Five in Tow


Earning His Love @ The Better Mom
Pin It!

Friday, March 9, 2012

Clothespin Game for Toddlers

 I based this project on an activity mentioned in the book The Toddler's Busy Book.  The activity they mentioned involved just cutting holes in the bottom of the egg carton and sticking clothespins in them.

I decided to make it more of a learning game by coloring the egg carton and the clothespins.


First, get a clean egg carton.  Use an exacto knife to cut a hole in the bottom of each egg cup.  Use markers to color the edges of the holes and to write the name of the color on the corresponding egg cup.  Use same markers to color the ends of the clothespins and to write the names of the colors.

This was a super-easy project.  I'm pretty sure it took less than half an hour to do.

Right now, Gracie enjoys taking the clothespins out and putting them back in, not necessarily in the "correct" holes.  Sometimes, she will match, and when she does, I make a big deal out of it.  When I've prompted her to find a specific color to match the clothespin, she will do it.  This is a great game for fine motor manipulation and for teaching colors.

You do have to be careful about your child pinching her fingers or hands with the clothespins.  Gracie likes to squeeze the clothespins and will get pinched.  Sometimes I think she does it on purpose just so she can say, "Ow!"


Pin It!

Thursday, March 8, 2012

Pistachio Dessert

Pistachio Dessert on dessert table at Old Fashioned Sunday
My sister-in-law Kris gave me this recipe years ago. It's really good! Of course, anything with pistachios, and especially pistachio pudding, is going to be delicious!


Ingredients:

1 stick oleo* (That's the old name for margarine, but I use butter.)
1 cup flour*
2 Tbs sugar*
1/2 cup nuts* (I chopped up pecans.)
8 ounces cream cheese, softened
large carton of Cool Whip (16 oz.), thawed and divided
2/3 cup powdered sugar
2 small packages instant pistachio pudding
2-1/2 cups milk
Extra nuts for sprinkling


Directions:

1. Before starting, make sure the oleo/margarine/butter, cream cheese, and Cool Whip are thawed or soft.
2.  Preheat oven to 350 degrees.

3.  Bottom layer:
Mix 1 stick oleo/margarine/butter, 1 cup flour, 2 Tbs sugar, and 1/2 cup nuts.  Put on bottom of your 9x13 pan. (*I may have had it too thick, but it didn't cover the whole bottom, so I mixed up some more to cover the whole bottom of the dish.)  Bake 10 minutes.  Take out and let cool.

4.  Next layer:
Mix 8 ounces cream cheese, half of the large carton of Cool Whip, and 2/3 cup powdered sugar.  Layer on top of the crust.

5.  Next layer:
Mix 2 small packages of instant pistachio pudding and 2-1/2 cups milk.  Put in fridge to make pudding.  Layer on top of the cream cheese-Cool Whip layer.

6.  Final layer:
Put the remaining Cool Whip on top and sprinkle with nuts.  Refrigerate for at least four hours before serving.

The finished dessert


Came home with half of it.  Not bad considering all of the other yummy desserts that were there!
Pin It!

Wednesday, March 7, 2012

Hanging Hand Towel for Little Ones

This is one of my "surprise" projects mentioned in my March Projects the other day.

I want Gracie to be able to wash her hands without much help from me.  In the hall bathroom, our handtowel holder is located rather high which makes it difficult for her to reach the towel when she needs to dry her hands.  I solved this problem by sewing ribbon onto a couple of handtowels and hanging the handtowel on the ring which makes it easier for her to reach.

The two handtowels and ribbon.

First, I cut off 8" of ribbon and pinned it to the upper left corner of the towel.  This is the back side of the towel.
Here, you can see how I stitched the ribbon onto the towel.  I basically made a square and X'd the square.  I also did a zigzag across the fold of the towel.


Here it is hanging in our {tiny} bathroom.

I added a regular handtowel for the grownups.

Here is the other towel.
This took about 15 minutes to do and only took that long because of the time it took to take the above pictures.

One final word of advice:  When you buy new pink towels, wash them separately.  DO NOT just think to yourself, "Oh, they'll be all right," and stick them in a load of regular wash.  You will regret it.

Coming soon:  a post about using Oxi-Clean to remove red and pink dye from white clothes!  Stay tuned!
Pin It!

Tuesday, March 6, 2012

Crispy Onion Chicken

I got this recipe from the February-March 2011 issue of Taste of Home.

Ingredients:

1/2 cup butter, melted
1 Tbs Worcestershire sauce
1 tsp ground mustard
1/2 tsp garlic salt (I used garlic powder and sprinkled some salt.)
1/4 tsp pepper
1 can (6 ounces) cheddar or original french-fried onions, crushed (I used a 6-ounce bag of original french-friend onions.)
4 boneless, skinless chicken breast halves

Directions:
1.  Preheat oven to 350 degrees.  Grease a 9-inch square baking pan.
2.  In a shallow bowl, combine the butter, Worcestershire sauce, mustard, garlic salt, and pepper. (I microwaved the butter in the shallow bowl and added the other ingredients to it.)  In another shallow bowl, add 1/2 cup fried onions.  Dip chicken in the butter mixture, then coat with onions.
3.  Place the chicken in the greased baking dish.  Top with the remaining onions; drizzle with any remaining butter mixture.
4.  Bake, uncovered, at 350 degrees for 30-35 minutes or until chicken juices run clear.

We really enjoyed this chicken.  I think I may have cooked it a little longer than the 35 minutes (but not by much).  The chicken, even the thick breasts, were done perfectly while the onions were somewhat overdone, but not burnt.
Pin It!

Saturday, March 3, 2012

Blog Post Roundup 3/3/12

Here is this week's list of notable posts.  Hope you enjoy!


Motherhood:  A Risky Business @ The Better Mom

Say My Name, Say My Name @ Cake Wrecks (This cracked me up.  She posts great cake wrecks, but sometimes her commentary can be inappropriate, so proceed with caution.  This post is rated G.)

Don't Fight the Small Stuff @ The Organizing Junkie

But for God's Grace !! @ Hidden Treasures

Four Focuses of Effective Parents @ Encouraging Words


Lessons of Life @ The Gil & Kelly Bates Family

How to Grow the Church by Keeping it Small @ Pastor Paul Chappell
Pin It!

Thursday, March 1, 2012

White Bean and Chicken Chili

This is one of our favorite recipes for the crockpot.  The original recipe came from a magazine, but I do not remember which one.  I have since changed it a little.

I served this at Gracie's first birthday party last year, and everyone really liked it.


Ingredients:

3 15-ounce cans white beans (Northern beans), rinsed and drained
4 cups chicken broth
1 Tbs vegetable oil
2 chicken breasts
salt and pepper

2 onions chopped
4 garlic cloves, chopped
2 4-ounce cans green chilies, drained
1 Tbs ground cumin
1 cup water

1.  Place beans and broth in crockpot.  Cook on high 2 hours.
2.  In the meantime, chop your onions and garlic to be used in step 4.
3.  Warm oil in skillet over medium-high heat.  Sprinkle chicken with salt and pepper.  Cook until brown, about four minutes.  Turn over and cook two minutes.  Transfer to a plate.
4.  Add onions and garlic to skillet.  Cook about 5 minutes.
5.  Add onions, garlic, chilies, 1 cup water, and cumin to the crockpot.  Stir.
6.  Add chicken to the crockpot.  Cook on low for six hours.
7.  Take chicken out of the crockpot and shred. (My favorite tip is to put it in my kitchen aid mixer with the paddle attachment and run it for about 15 seconds or so.)
8.  Add chicken back to the crockpot and stir.  Ready to serve!

The original recipe called for less white beans and more chicken, but we agreed that we'd prefer more white beans and less chicken, so I changed the ratio.

The only thing I don't like about the recipe is that you have a few steps in the middle of cooking it, so you have to be home at the appropriate time.  However, it is a great recipe and worth the inconvenience.
Pin It!

PrintFriendly