 |
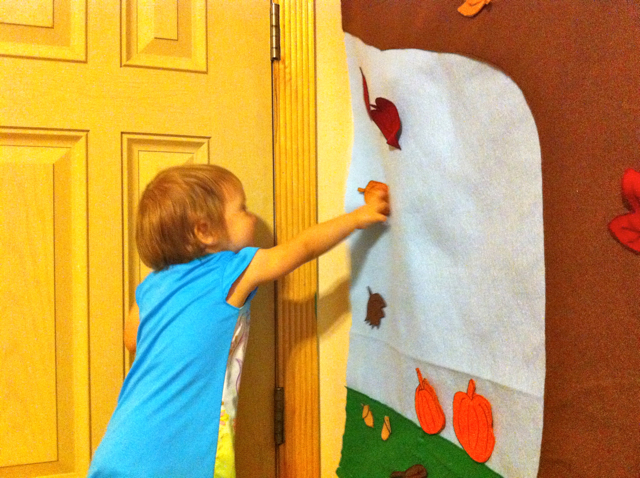
| Gracie loves her new Felt Fall Scene! |
If you've been a reader of my blog for the last couple of weeks, you'll know that I've really been into getting great ideas from
Pinterest. One great idea I've seen is that of a felt Christmas tree which your child can decorate with felt decorations. I will be making that one soon, probably the week after Thanksgiving. The other day, Gracie and I went to Storytime at the old Davis-Kidd Bookstore (THE BEST Storytime in Memphis!). Mrs. Marjorie gave the children a paper with a fallish tree on it and some foam stickers (pumpkin and two leaves). Gracie LOVED sticking them on the paper, on herself, on me, on the wall....... It wasn't long before before the stickers lost their sticky, and that got me to thinking.... (sometimes that's a bad thing, but in this case, I got a good idea of something to make for Gracie to play with). This is the result: A fall scene made of felt with felt accessories. It took me roughly 5-6 hours to do the whole thing (not counting shopping for the materials!). As you can see, it's rather large, so a smaller one would not take as long. Plus, I was pretty much winging the process and that always takes longer than having a plan you can follow.
Materials Used
- 1 yard of sky blue felt (for the background)
- 1 yard of dark brown felt (for the tree and some of the leaves)
- 4 squares of green-like-grass felt (for the grass)
I had a horrible time trying to decide which shade of green to use or whether I should use a tan color since grass dies in our part of the country. I decided to use regular medium green so that I can reuse this scene in the Spring!
- white thread
- dark brown thread
- green thread
- white felt (for the clouds)
- orange felt (for the pumpkins)
- dark yellow felt (for some of the leaves)
- dark red felt (for some of the leaves)
- tan felt (for the squirrel, acorns, and owl)
- 1 one-yard-long 1/4" diameter dowel
- 3 one-foot-long dowels (smaller than 1/4") -- can definitely use another yard-long-one like the one above
- scissors
- sewing machine
- black sharpie marker for drawing
- length of cord (I used clothesline from Home Depot)
- an over-the-door hook (borrowed from the bathroom)
Here's How I Made It
First, I cut the blue felt to the size that I wanted it to be. I guestimated by holding it in front of a door. I wanted it to be tall enough for it to last several years. It was already one yard wide and I wanted it somewhat proportional to a portrait style size.
Then, I laid the dark brown felt on top of the blue felt and I cut out "what wasn't a tree" free-handed. (Karate Kid reference, in case you didn't catch that.)
I only had one small piece of small white felt. I wish I could've had at least one more piece so that I could make fluffier clouds. I cut it into thirds and placed up top and cut them into cloud shapes.
If I had thought about it -- which I did but it was too late and I didn't want to use my seam ripper -- I would have put a yellow sun with orange rays and a smiley face in the corner.
I pinned everything to the blue felt. At this time, I didn't have any green felt (except for the sparkly green felt that I had bought for the Christmas tree activity that I will make in a couple of weeks). I sewed what I could, leaving the bottom part of the tree unsewn. After I bought the green felt that took me half an hour to decide on, I sewed the rest of it. I had to get the small pieces of green felt because they didn't have the appropriate color in the large sizes on a bolt.
Sewing the top pieces to the blue felt was the most time-consuming. I had to roll up a lot of it so that I could make it fit through the side of the sewing machine when sewing. I did the long parts first -- the bottom part of the lower branch and the left side of the tree followed by the right side of the tree on up. I sewed all of the edges of the pieces.
Lastly, I folded down the top and bottom edges and sewed across to make a "tube" to put the dowels. My original plan was to put dowels on all four sides to make it lay flat, but I finally decided doing the sides was unnecessary.
I pushed the dowels through, as well as the cord. I left the cord long enough so that it can be adjusted to just about any height
Lastly, I drew the shapes of the leaves, squirrel, owl, pumpkins, and acorns on the appropriate colors. I drew them freehanded, but while looking at pictures pulled up on Google images for help.
One great advantage is that it can be rolled up for storage or transportation. We will be taking this to Grandma's house!
My husband had a great idea that I'm going to try to do. He suggested putting the Bible verse on it from Psalm 1:3 - "And he shall be like a tree planted by the rivers of water, that bringeth forth his fruit in his season; his leaf also shall not wither; and whatsoever he doeth shall prosper."
If you make one for your child, please give me the link to your photos. I'd love to see your creations. Also, if you have any more ideas for additional accessories, let me know in the comments.
Pictures of Gracie Playing
(Graphics intensive)


0 comments:
Post a Comment